We are going to start the most first MIDlet with LWUIT, using NetBeans 6.9 and LWUIT 1.3
It's supposed that NetBeans 6.9 have been installed correctly.
Before start coding, we have to download and install LWUIT.
-Download LWUIT and unzip in any folder you want.
http://java.sun.com/javame/technology/lwuit/Create a MIDlet project
- Run NetBeans and start a new Mobile Application.
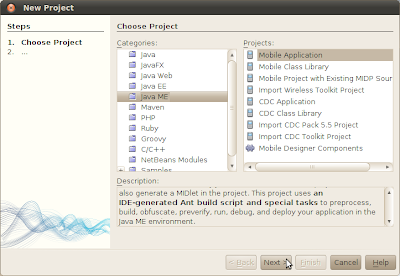
- Enter name of your project, HelloLWUIT. Un-select Create Hello MIDlet, click Next.
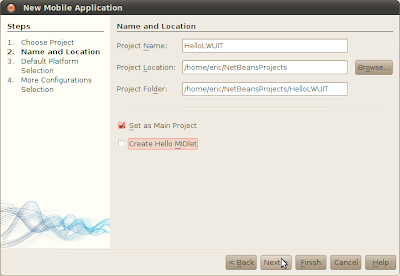
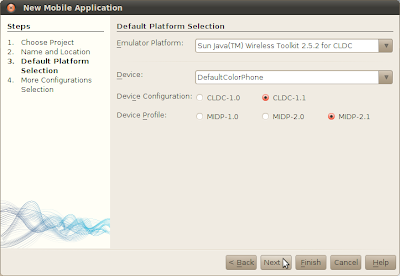
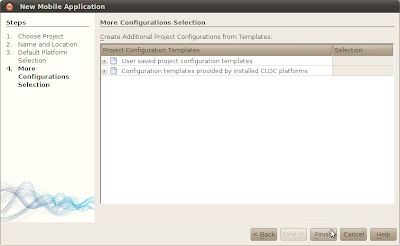
- Accept the default platform selection and configuration selection
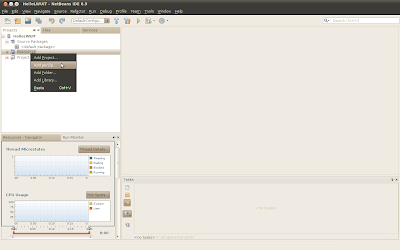
Add LWUIT 1.3 in the project.
- In the Projects pane, right click on Resources, click Add Jar/Zip.
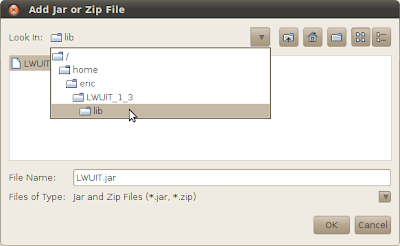
- Browse to the location of the downloaded and unzipped LWUIT.jar, click OK.
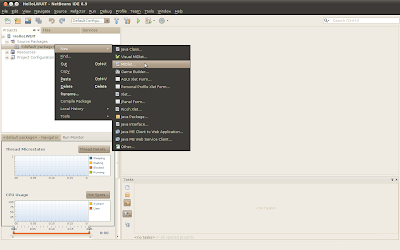
Start coding
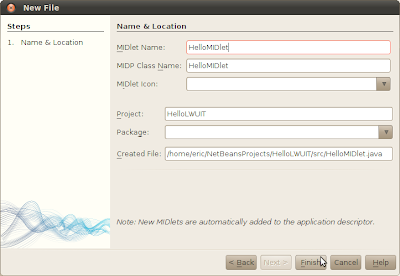
- Right click our project package to New a MIDlet
- Enter the name and click Finish.
- Type in the code:
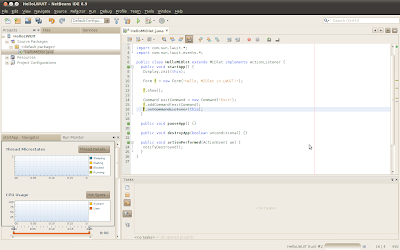
import javax.microedition.midlet.*;
import com.sun.lwuit.*;
import com.sun.lwuit.events.*;
public class HelloMIDlet extends MIDlet implements ActionListener {
public void startApp() {
Display.init(this);
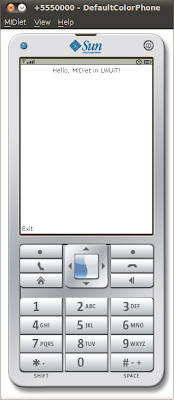
Form f = new Form("Hello, MIDlet in LWUIT!");
f.show();
Command exitCommand = new Command("Exit");
f.addCommand(exitCommand);
f.setCommandListener(this);
}
public void pauseApp() {}
public void destroyApp(boolean unconditional) {}
public void actionPerformed(ActionEvent ae) {
notifyDestroyed();
}
}
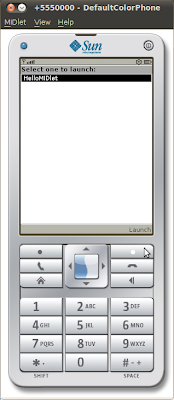
Finally, you can run it now.